
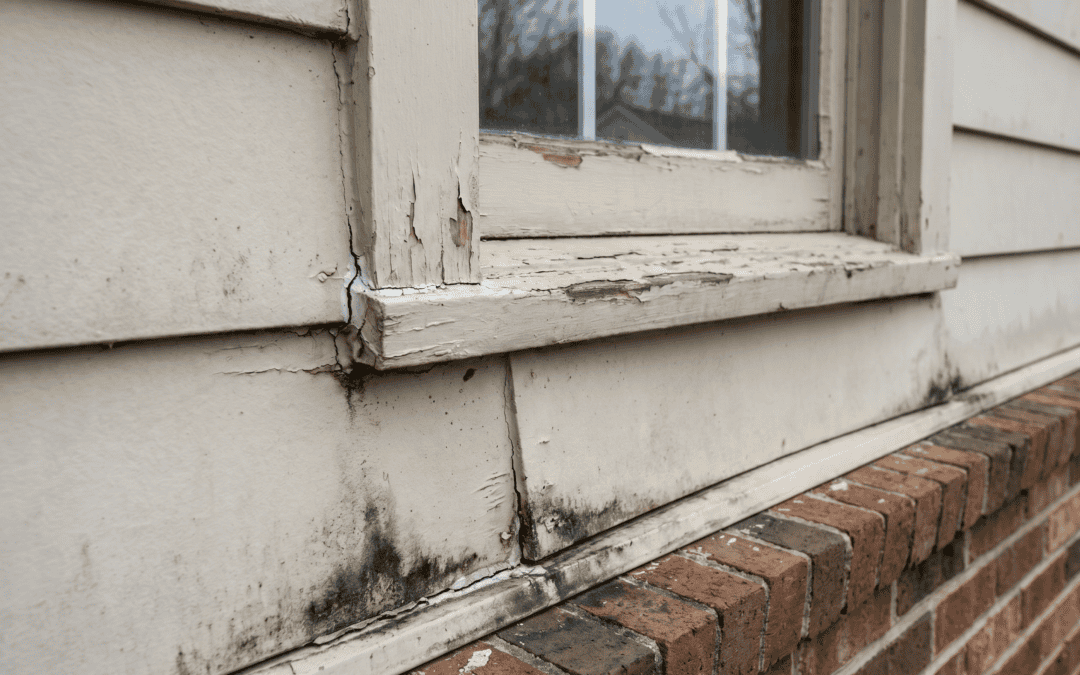
Most homeowners first notice dry rot when paint begins peeling, trim feels soft, or a section of siding looks noticeably worse than the surrounding wall.
The visible damage is usually what gets attention. The hidden damage is what creates the real concern.
When you’re dealing with dry rot, the question is rarely limited to the board you can see. Contractors want to know why moisture reached that area, how long it has been there, and whether nearby materials have also been affected.
In many cases, a small section of damaged siding turns out to be a localized repair. In others, removing siding reveals deteriorated sheathing, affected timber, or moisture-related issues that have been developing for years.
Understanding the warning signs and common causes can help homeowners make better decisions before a manageable repair becomes a much larger project.
What Dry Rot in Siding Actually Means
Despite its name, dry rot does not occur in dry conditions.
A dry rot fungus requires moisture to become active. Once moisture levels rise enough inside wood and timber, fungal decay can begin. The term “dry rot” survives largely because the affected wood often appears dry and brittle after significant deterioration has already occurred.
This distinction matters because homeowners sometimes focus on the damaged board while overlooking the moisture source that allowed the problem to develop.
A small area of visible rot may represent a larger issue hidden behind siding, trim, or flashing.
Why Contractors Take Dry Rot Seriously
Not every area of rot creates a structural concern.
Damage in decorative trim is different from damage in sheathing, framing, or other load-bearing materials. However, once dry rot reaches structural components, questions about structural integrity become much more important than appearance.
In severe cases, prolonged moisture exposure can contribute to severe structural damage around windows, doors, and other vulnerable sections of the exterior wall system.
That is why experienced contractors rarely stop at the first visible sign of deterioration. They investigate the surrounding materials to understand the full extent of the problem.
Why Dry Rot Starts

Most dry rot problems start with moisture getting into the wall.
The board usually isn’t the problem by itself. Age isn’t either. And it’s rarely just bad luck.
What typically happens is water finds its way in through a failed detail, then stays trapped long enough for fungal growth to begin.
Common Sources of Moisture
Every dry rot problem has a moisture source. Some are obvious. Others remain hidden behind siding for years.
Common causes include:
• Failed flashing
• Damaged siding joints
• Roof runoff issues
• Window leaks
• Door leaks
• Open caulk joints
• Improper siding clearances
• Building defects
Repeated water ingress creates the damp conditions fungi need to thrive. Without moisture, dry rot cannot continue developing.
Moisture Content Matters More Than Appearance
Many homeowners assume painted siding is protected. Unfortunately, surface appearance can be misleading.
A wall can look perfectly normal while moisture content continues increasing behind the siding. Paint, caulk, and trim often conceal the problem until significant deterioration has already occurred.
This is especially common around window frames and window sills where multiple joints, transitions, and flashing details must work together to keep water out. The U.S. Environmental Protection Agency notes that controlling moisture is the foundation of preventing building-material deterioration and related biological growth (EPA moisture control guidance).
Ventilation Can Also Play a Role
Exterior leaks are the most common cause of dry rot, but poor ventilation can contribute to long-term moisture issues inside wall assemblies.
When damp timber and damp wood remain exposed to elevated moisture levels for extended periods, fungal growth becomes more likely.
A consistently damp area creates ideal conditions for timber decay.
Signs of Dry Rot Homeowners Should Watch For
Finding dry rot early is often the difference between a straightforward repair and a major restoration project.
The challenge is that the early stages rarely look dramatic.
Physical Changes in Wood
One of the easiest ways to identify dry rot is by paying attention to changes in the condition of wood surfaces. Healthy wood feels solid and resists pressure. Dry rotted wood often becomes soft, brittle, or spongy.
As deterioration progresses, rotted wood may develop cuboidal cracking, a distinctive pattern where the wood breaks into block-like sections rather than splitting naturally along the grain.
You may also notice:
• Soft trim boards
• Crumbling corners
• Brittle siding sections
• Small patches of visible decay
• Areas that feel hollow when pressed
Even minor signs deserve investigation because visible damage does not always reflect the full extent of deterioration hidden behind the siding.
Fungal Signs That Deserve Attention
A dry rot smell is often described as musty, earthy, or damp. While smell alone does not confirm a dry rot infestation, it should not be ignored.
Visible fungal growth may also appear on affected materials.
In more advanced cases, homeowners may discover a fruiting body or dry rot fruiting bodies developing on wood surfaces. These structures are part of the fungus’s reproductive process and indicate an established problem.
Some fungal colonies create white growth resembling cotton wool. Others produce visible fungal strands or dry rot strands that extend across timber surfaces.
Contractors occasionally discover these strands behind siding systems where moisture has remained trapped for extended periods.
Understanding Dry Rot Spores
Fungal spores are naturally present in the environment, so their presence alone is not the issue. The real concern is whether the conditions are right for them to become active.
When spores come into contact with damp wood and the moisture level stays high enough, decay can begin. If those conditions continue, the fungus can keep growing, release more spores, and spread to nearby materials.
That is why moisture control remains the most important defense against dry rot.
Dry Rot Around Windows, Trim, and Hidden Components
Window areas are one of the most common places contractors discover dry rot because they contain several details where water can enter: exterior trim joints, sill edges, flashing transitions, caulk lines, and gaps around the window frame. When any of these details fail, moisture can collect behind the visible surface materials and remain trapped inside the wall assembly.
In many cases, the first visible sign is deteriorated trim below or beside a window. Once that trim is removed, contractors may find soft sheathing, damaged framing, or moisture-affected components behind it. What appears at first to be a small exterior repair can become a larger remediation project once the surrounding materials are inspected and the full extent of the damage is exposed.
Why Window Areas Are Vulnerable
Window frames and window sills contain numerous transitions where water management details must work together. Flashing, sealants, siding, trim, and weather barriers all play important roles. When one component fails, moisture can repeatedly enter the same section of wall.
Over time, affected wood, affected timber, and surrounding materials may begin deteriorating.
Hidden Damage Is Common
Dry rot can be difficult to assess because the visible damage is often only part of the problem. Siding, paint, caulk, and trim can all make an exterior surface look acceptable while moisture is still affecting the materials behind it.
Paint may cover early signs of deterioration. Caulk can temporarily hide failed joints. Trim can conceal damaged sheathing, framing, or other hidden components. By the time soft wood, staining, cracking, or visible decay appears, moisture may have been present inside the wall assembly for a long period of time.
For this reason, contractors typically look beyond the damaged material itself. The goal is to identify where the moisture entered, how far it traveled, and which materials were affected before making repairs.
When Sheathing Becomes Involved
Trim repairs are usually relatively straightforward. Sheathing repairs require a closer look because they involve materials beneath the siding and may affect the wall assembly more broadly.
Once moisture reaches structural layers, the repair scope can expand significantly. That does not automatically mean full replacement is necessary, but it does mean a thorough inspection becomes much more important.
Dry Rot vs Wet Rot: Why the Difference Matters
Homeowners often hear both terms used interchangeably, but dry rot and wet rot are not exactly the same thing.
Wet rot is generally more common in residential siding systems. It develops where wood remains consistently wet and usually stays close to the original moisture source.
Dry rot receives more attention because a serious dry rot problem can affect materials beyond the initial leak location. Under favorable conditions, fungal elements can move through affected areas and continue damaging nearby timber.
For homeowners, the distinction is useful, but it should not distract from the bigger issue.
Both problems start with moisture.
Both can damage wood.
Both become more expensive when left untreated.
The condition of the material matters far more than the label attached to the decay. Research published by the U.S. Forest Service consistently shows that fungal wood decay depends on moisture availability, regardless of the specific decay classification (USDA Forest Service wood decay resource).
Why Dry Rot Can Spread Behind Siding
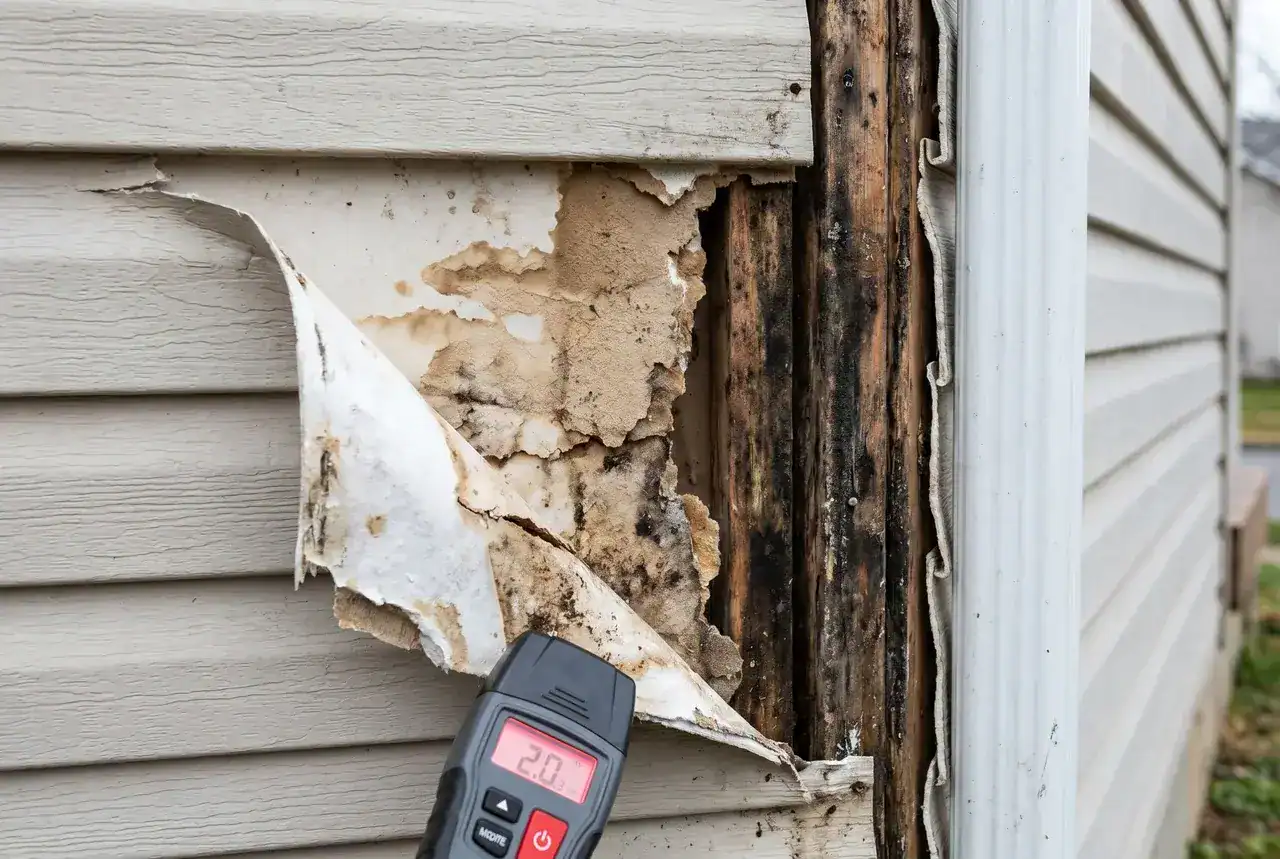
One reason contractors take dry rot seriously is that visible damage often understates the scope of the problem.
A Dry Rot Outbreak Usually Starts Small
Most cases begin at a single moisture entry point. A window leak. A failed flashing detail. A siding joint that allows repeated water intrusion.
What starts as a localized issue can eventually become a larger dry rot outbreak if moisture remains present long enough.
The fungus itself is not the root problem.
Water creates the opportunity.
Dry Rot Infestation and Dormant Growth
When contractors uncover a significant dry rot infestation, they almost always find years of unresolved moisture exposure.
The dry rot lifecycle depends heavily on environmental conditions. Growth accelerates when moisture is available and slows when conditions improve.
Certain fungal elements can remain dormant for extended periods before becoming active again when moisture returns.
This is one reason inspections often extend beyond the immediately visible damage.
Hidden Areas Create Uncertainty
Nobody can accurately determine the full extent of deterioration until affected materials become visible.
This is why estimates occasionally change after siding removal begins. Additional damaged wood, affected timber, or rotted wood may be discovered behind surfaces that appeared intact from the outside.
As more timber becomes involved, repair complexity increases. That is also why delays can lead to further damage and larger repair scopes over time.
Why Surface-Level Dry Rot Repair Often Falls Short
A common mistake homeowners make is focusing only on the visible damage instead of identifying the conditions that caused it. If a soft trim board is removed and replaced but the leak or moisture source remains, the repair may only be temporary.
Over time, water can continue entering the same area, creating the same conditions that allowed the decay to develop in the first place. Several years later, the damage may return, often in the same location or in nearby materials.
Dry Rot Repair Requires Moisture Control
Many failed dry rot repairs have the same underlying issue: the damaged material is removed or replaced, but the moisture source is never corrected. When water intrusion continues, the same conditions that allowed decay to develop remain in place.
A lasting repair requires more than addressing soft or deteriorated wood. The source of the moisture needs to be identified and corrected so the repaired area is not exposed to the same problem again.
Understanding the Limits of Dry Rot Treatment
There is a role for dry rot treatment in some situations. There is not a treatment that makes ongoing moisture acceptable.
Homeowners sometimes assume they can treat dry rot, kill dry rot, and move on without addressing the underlying cause. That approach rarely produces long-term results.
Even when fungal activity is stopped, damaged materials remain damaged.
Wood Hardener and Cosmetic Repairs
Products such as wood hardener can have limited applications for stabilizing minor areas. However, a wood hardener does not restore structural strength to severely deteriorated materials.
Similarly, cosmetic repairs involving fillers, patching compounds, or a wire brush may improve appearance without addressing deeper concerns.
Contractors frequently encounter previous repairs where drilled holes, fillers, and coatings concealed deterioration but failed to solve the underlying moisture issue.
When Materials Need Replacement
Sometimes the correct solution is straightforward. Replace damaged wood.
When affected wood, rotted wood, or structural components have lost strength, replacement becomes more practical than attempting to preserve compromised materials.
The decision should always be based on material condition rather than appearance alone.
When Inspection, Repair, or Siding Replacement Makes Sense
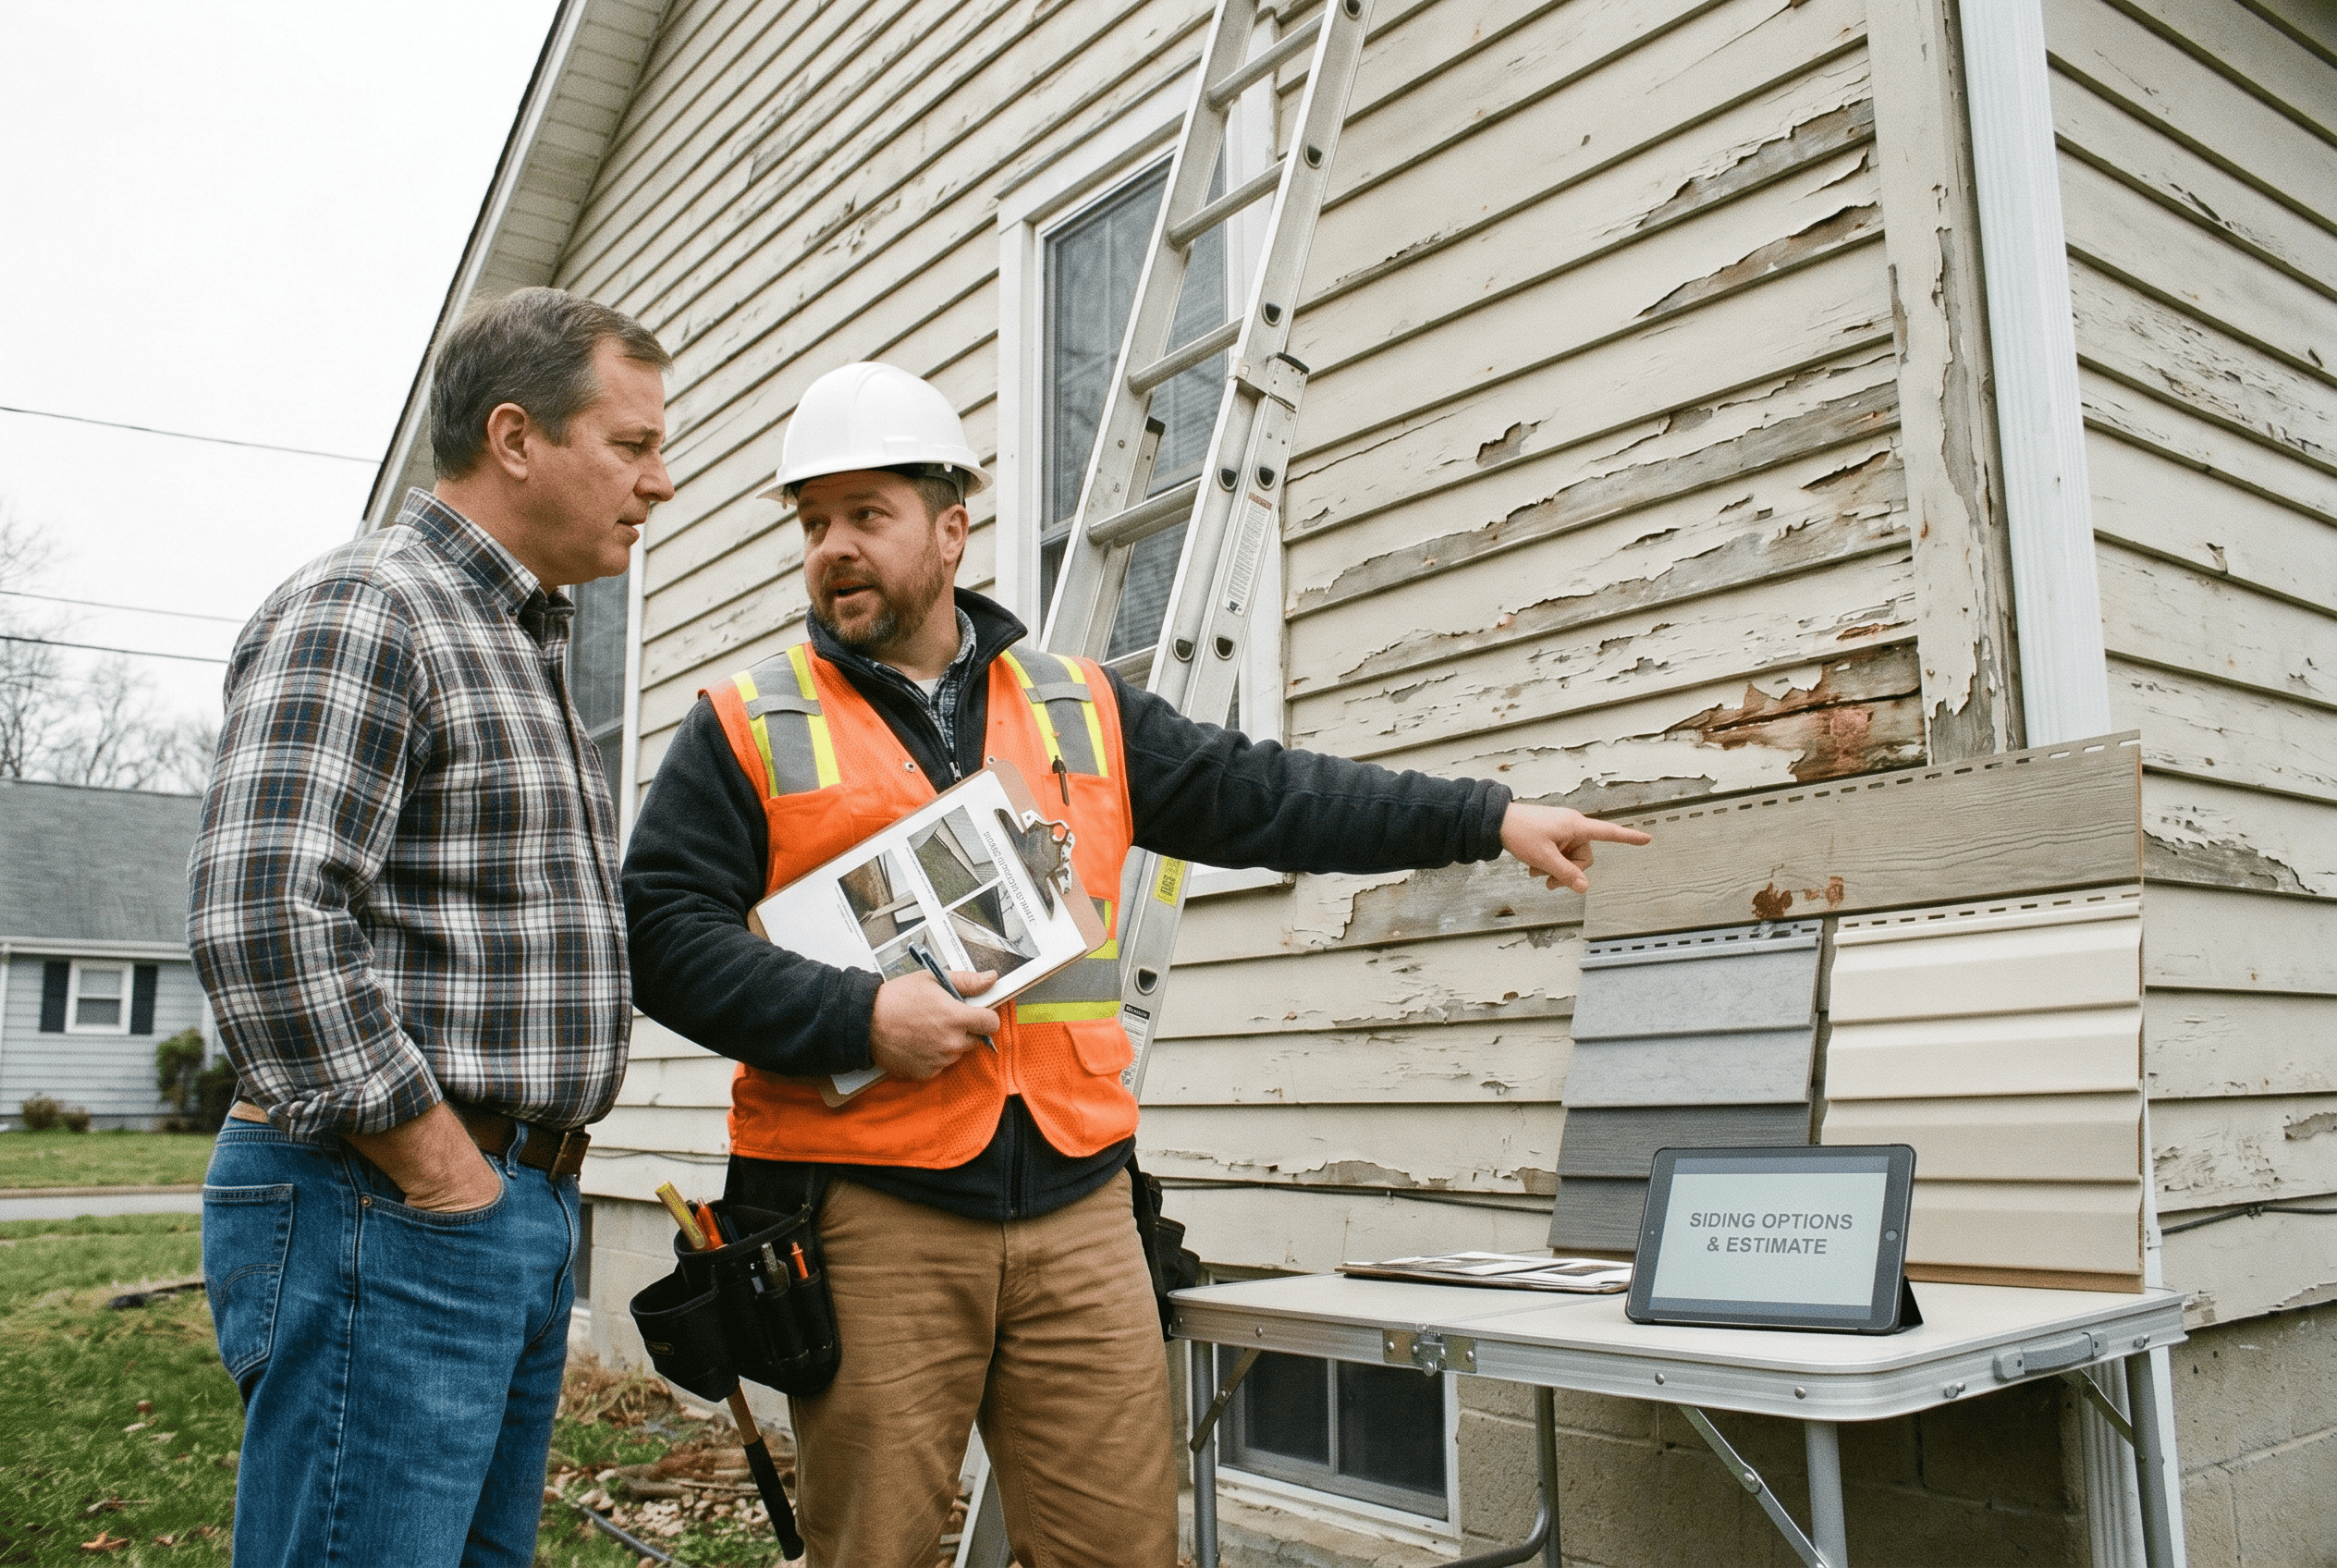
Most homeowners are not trying to become experts in fungal decay. They simply want to know what comes next.
When a Dry Rot Survey Is Worth Considering
A professional dry rot survey can provide valuable information when visible damage appears limited but hidden deterioration is suspected. The purpose is not to create alarm, but to better understand the full scope of the issue before repairs begin.
Accurate repair recommendations depend on identifying which materials have been affected, how far the damage extends, and where moisture is entering the wall assembly. With that information, contractors can make more informed decisions about what needs to be repaired, replaced, or monitored.
Dry Rot Treatment Costs Depend on Scope
Dry rot treatment costs vary dramatically because every project is different.
A localized trim repair is very different from replacing sheathing, flashing, trim, and siding around multiple openings.
That is why reliable pricing starts with inspection rather than assumptions.
Repair vs Replacement
Targeted dry rot repair often makes sense when deterioration is isolated and surrounding materials remain healthy. However, repeated repairs in the same area can indicate a larger issue.
When damage extends through multiple layers of the wall assembly, replacement may offer better long-term value.
In many cases, homeowners discover that modern siding replacement options provide a more durable solution than continuing to patch aging materials.
The same principle applies when owners are already considering upgrading aging exterior cladding because of recurring repairs, moisture problems, or overall siding age.
Structural Integrity Comes First
Cosmetic appearance should never be the primary factor when structural integrity is in question.
Materials that have lost strength require evaluation and, when necessary, replacement. A small area of visible decay can occasionally reveal a much more serious problem once siding is removed.
That is why inspection should always come before confident recommendations.
How to Reduce the Risk of Future Rot
The best dry rot repair is the one that never becomes necessary.
Focus on Early Detection
Early detection gives homeowners options. Late detection limits them.
Small maintenance concerns often become major repairs simply because they remain unnoticed for years.
Paying attention to changes in siding, trim, paint, and sealants can help identify moisture issues before significant deterioration develops.
Control Water Before Anything Else
Controlling water ingress remains the most effective way to prevent rot.
The fungi are not the root cause. The water is. When moisture is prevented from entering the wall assembly, fungal growth struggles to gain a foothold.
Maintain Exterior Components
Regular maintenance can help reduce the likelihood of future problems.
Address peeling paint.
Monitor sealants.
Inspect flashing details.
Look for signs of moisture around window frames and window sills. Even small maintenance issues deserve attention before they become larger repairs.
Increase Ventilation and Manage Moisture
In some situations, contractors may recommend ways to increase ventilation and reduce persistent moisture exposure.
Proper damp proofing, drainage details, and moisture management strategies all contribute to a healthier siding system.
Watch for Other Exterior Moisture Indicators
If you notice exterior mold growth, do not automatically assume dry rot is present. Surface mold on exterior materials often signals persistent moisture exposure, making it a useful early warning sign that water-management details deserve closer attention.
Instead, treat it as a sign that moisture conditions deserve closer attention.
Moisture-related issues rarely improve on their own.
Final Thoughts on Dealing With Dry Rot
Dealing with dry rot is rarely just about replacing a damaged board.
The visible decay is often the result of a larger moisture problem that has been developing behind the siding system.
Whether the issue involves dry rot, wet rot, affected timber, or localized wood rot, the most important step is identifying and correcting the source of moisture.
The sooner problems are discovered, the more options homeowners typically have. When damage is caught early, repairs may remain relatively contained.
When moisture continues unchecked, the scope of work often expands to include sheathing, trim, framing, and larger portions of the exterior wall system.
If you suspect dry rot in your siding, focus less on the visible damage and more on understanding what allowed it to develop in the first place.